|
To try this kind of imagery, you need a slide of the image you want to project, something or someone to project the slide on, a dark backdrop so the projected
slide doesn't show up on the backdrop (unless you want it to), and a slide projector.
Project the image on the subject. The slide projector needs to be back far enough or have a wide enough zoom lens so that the image wraps around the
subject.
Focus the projector and turn off any lights except for the projector. Slide projector lenses have minimal depth of field so the plane of the film in the projector needs to be parallel to the primary plane of your subject. The image will blur as it wraps around your subject.
Meter the projected image on the subject. Put your camera on a tripod and photograph your newly combined image.
Bracket your exposures from one stop less than the camera meter tells you to as much as two or even three stops more than the camera meter tells you.
I used apertures of f/8 and f/11 to give a reasonable depth of field to my subject. Exposures can be long, easily running from one second to as long as 20
seconds with 100 speed slide film.
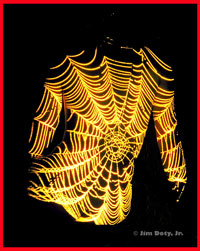
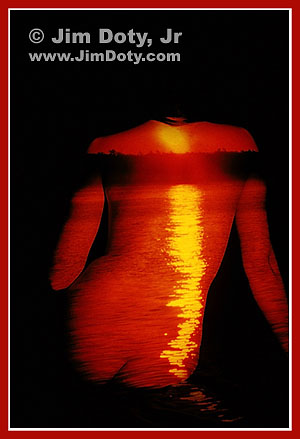
The projected image can be almost any subject from landscapes to flowers to people.
You can project onto people, vases, furniture, fabrics, some kinds of glass objects and a host of other subjects. Projecting onto light toned subjects generally works best.
There is usually a contrast gain in the original image when it is
projected and rephotographed. Due to the tungsten bulb of the projector, the coloring of the original image will shift in the yellow direction. You can compensate for this by using an 80A, 80B, or 80C filter, depending on the amount of color shift (80A for the most color shift, 80C for the least).
|