 |
 |
 |
|
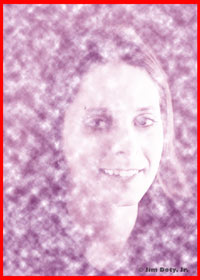
Layers in Photoshop Layers in photoshop create lots of possibilities. Even in basic photo editing, it is best to create a duplicate layer and do editing, filters, and other changes in the layer. If you don't like the result, throw the duplicate layer into the trash can and start over with the original unchanged layer. Layers also make possible infinite special effects. The image at upper right is one example. Color must be discarded from the image on the left before it is added back to the image on the right. The best grayscale image was achieved by first going to Channels > Red. With the red channel selected, do Image > Mode > Grayscale. A grayscale image has now been created from the red channel and all color information has been thrown away. Return the image to color mode by doing Image > Mode > RGB Color. The image is now back in the color mode even though no color is yet present. Create a duplicate layer: Layer > Duplicate Layer. With the duplicate layer selected, do Image > Adjust > Curves. In the dialog box, change Channel to Red. Grab the "curve" (a straight line until you move it) in the middle and pull it up and to the left to add a slight reddish caste to the image. With the upper layer still selected, do Filter > Render > Clouds. The upper layer will turn into reddish clouds. In the Layers palette, turn Normal to Screen. The face now appears in the clouds. Image > Adjust > Levels allows you to lighten, darken, or change the contrast of the image by moving the three triangular sliders. For the image above, I chose a light, pastel, high key effect. You can change the overall color of the image by going to Image > Adjust > Hue Saturation. Drag the Hue slider left or right to change the color. Drag the Saturation slider left or right to change the color intensity. |
|
A larger version of Kea in the clouds. |
|
Feb 11, 2001 |
|
Copyright © Jim Doty, Jr. All rights reserved. |
|
|
|
||||||||||||||||||||||||