|
|
 |
|
|
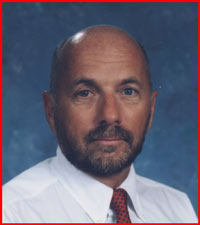
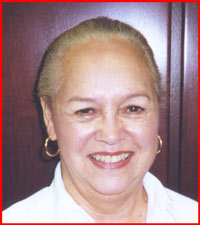
As a gag for a party, I was asked to take the two faces above and and put them into the classic painting, American Gothic.I scanned all three images and opened
them in Photoshop (LE works fine for this kind of work). The two faces, viewed at the same magnification, were much larger than the faces in American Gothic. Both faces were RESAMPLED (IMAGE: IMAGE SIZE)
until they were just slightly larger than the faces they would replace. |
|
|
|
|
|
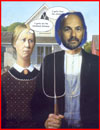
To move the faces in a relatively simple manner, I created a LAYERS sandwich with American Gothic as the top and bottom layers and the new face as a
middle layer. First, I used the LASSO tool to draw a circle around the man's face. Then I took the MOVE tool and moved his face and put it over the
farmer's face. |
|
|
|
|
The man's face is now a new layer that can be moved, resized, and rotated over the background image. On the right, you can see the man's face at 100%
opacity. After moving the man's face, I reduced the opacity of his face so I could see the oroginal farmer's face underneath. |
|
|
|
|
|
|
|
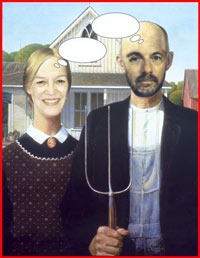
With the opacity reduced, you can clearly see through to the background layer.In this illustration, the images are deliberately misaligned so you
can see the faces on both layers. |
|
|
|
|
With the background face visible below the new face, both faces need to be carefully aligned so that features match as much as possible. The new, upper face
may need to be resized and rotated to match. The chin line on the new face must be right at or just slightly below the chin line on the background layer. Once the faces are aligned, the new face can be brought
back to 100% opacity. Save your work. |
|
|
|
Now the background layer is selected (made active), and then a DUPLICATE or COPY of the background layer is made. In the LAYERS palette, the face layer must be
dragged so it is now between the two background layers. We now have our sandwich with the top and bottoms layers as the background and the new face in the middle. |
|
|
|
Select the top (background) layer so it is active, and reduce the opacity of this layer so you can see both the top face and the new face underneath. Using the
ERASER tool, carefully erase the upper face from the eyebrows to the chin, fully revealing the eyebrows, eyes, nose, mouth, and chin line of the new face. You will keep the forehead, hair, ears, and part of the
jaw line of the old face. This means the new faces will still have much of the outline of the old faces. When this process is completed, select the new face
layer. Then change the COLOR BALANCE, BRIGHTNESS level, and NOISE level of the new face to match the rest of the image. Save you work. When you are happy
with the match, you can FLATTEN the image to turn the three layers into one. You will probably need to use the CLONE tool to match edges where the merged faces meet. |
|
|
|
|
|
Once the process is completed with the man's face, the whole procedure is repeated again to add the woman's face to the image. I erased the
captions which were on the original image given to me so the client can add their own captions. |
|
|
|
|
July 3, 2000 |
|